Installation
MSNoise is a python package that uses a database (sqlite or MySQL) for storing
station and files metadata together with jobs. When installed, it provides a top
level command msnoise in the console.
This version will be the last to be tested on Python 2.7. The EOL (end of life) of 2.7 is 2020, which means it is high time for users to migrate. For users having a complete set of tools in Python 2.7 and not keen to move to 3.x soon, the incredible easiness of creating a Python 3.x environment in conda, for example, will allow them to run MSNoise in the future.
Note that MSNoise is always tested against the latest release versions of the main packages, so older installations that are not maintained/updated regularly (years) could encounter issues. Please make sure you have the latest version of Numpy and Scipy (and MKL), as performance gets better and better (especially since Anaconda Inc. released its fast MKL implementations for all users, in the conda-forge channel).
To run MSNoise, you need:
A recent version of Python (3.x recommended). We suggest using Anaconda with a few extra modules. MSNoise is tested “continuously” by automatic build systems (TravisCI and Appeveyor) for Python 2.7 and Python 3.7, on Windows, Linux and MacOSX 64 bits systems! Support for Python 2 .7 will be dropped as soon as the TravisCI test don’t pass and the corrections would take too much dev time.
MySQL: if you want to use MySQL, you need to install and configure a MySQL Server beforehand. This is not needed for sqlite. Read About Databases and Performances for more information. We recommend using MySQL.
Full Installation
Download and install Anaconda for your machine, make sure Anaconda’s Python is the default python for your user
Execute the following command to install the missing packages:
conda install -c conda-forge flask-admin flask-wtf markdown folium pymysql logbook
conda install -c conda-forge obspy
Install a MySQL server and MySQL Workbench:
Download and install MySQL Community Server (MySQLs ) and MySQL Workbench (MySQLw ) ; On Windows one can also use the MySQL installer (MySQLi ).
On Linux, the MySQL server can also be installed using the following command:
sudo apt-get install mysql-server
Create a privileged user and a database:
Start MySQL Workbench and connect to the local database
Click on “Privileges” and create a new user, with all privileges (Select all). Ideally, create user “msnoise” with password “msnoise”.
Install the latest release version of MSNoise:
pip install msnoise
Power user could install the development version too, but it is not recommended.
Check which required packages you are still missing by executing the
msnoise bugreportcommand. (See Testing the Dependencies)To be sure all is running OK, one could start the
msnoise testcommand. This will start the standard MSNoise test suite, which should end with a “Ran xx tests in yy seconds : OK”.Proceed to the Workflow description to start MSNoise!
Done !
MySQL Server and Workbench
Using the MySQL Server and Workbench is fairly easy and lots of tutorials are available online as text or videos.
Once both are installed, start Workbench and you should see the local MySQL server automatically identified:
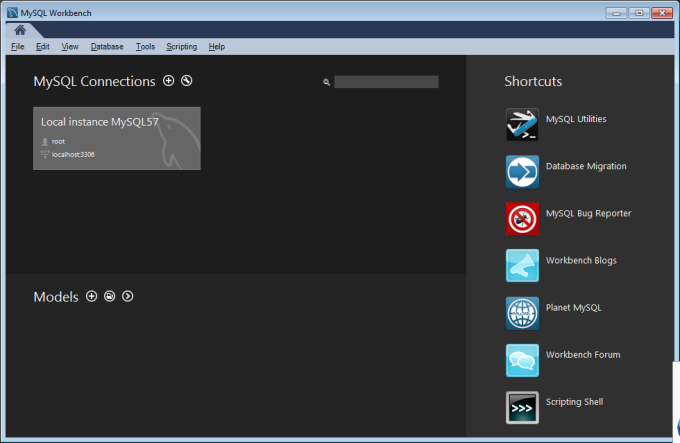
And by clicking on “Local Instance …” another tab should open, connected to the local database.
Create a msnoise user
Select “Users and Privileges” in the left sidebar, then “Add Account”. Define the username and the password (msnoise:msnoise could do, although “weak”):
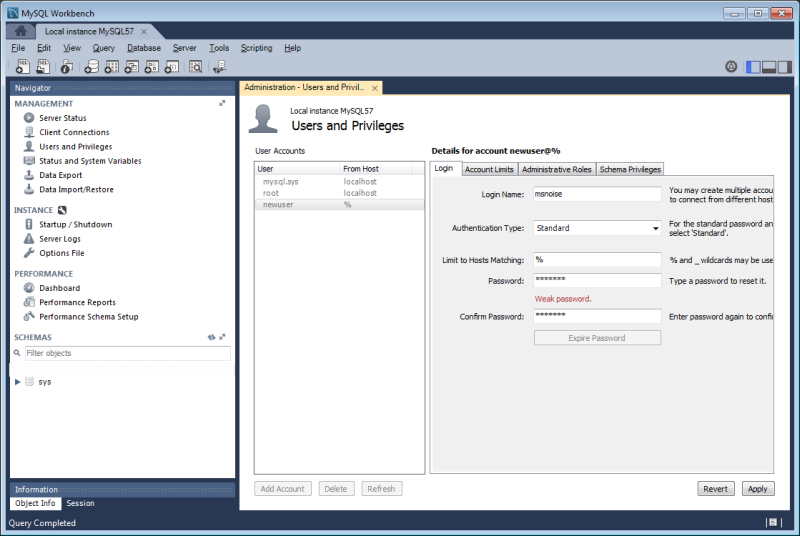
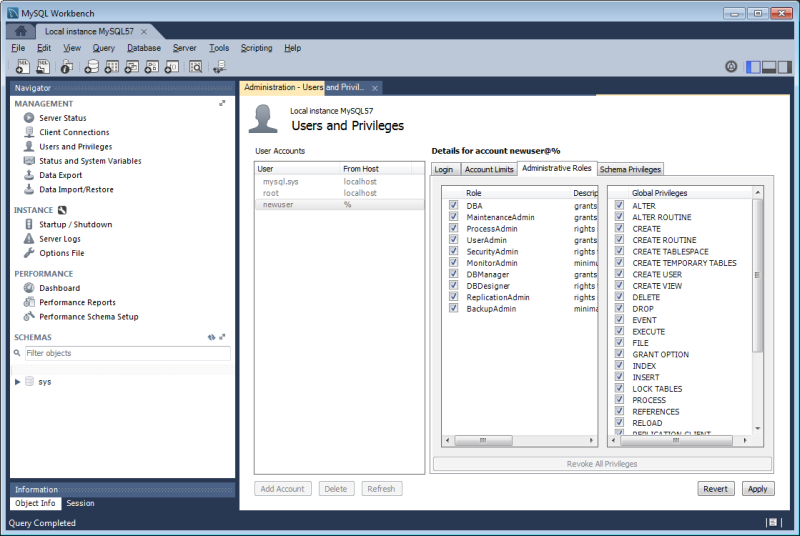
Then, under “Administrative Roles”, grant this user the DBA mode (user can perform all tasks on the database server) and click “Apply”.
Create an empty database
Ideally, each “project” needs a database. For example, if one has two different
volcanoes and wants to run MSNoise using the these distinct datasets, one needs
to create two empty databases. For users who have access to only 1 database,
the `msnoise db init allows to provide a prefix`, which works like the
Wordpress prefixes: for example if a prefix is “vA”, the `config
table that will be created is vA_config in the database.
Click on the “Create new schema” button in the taskbar:
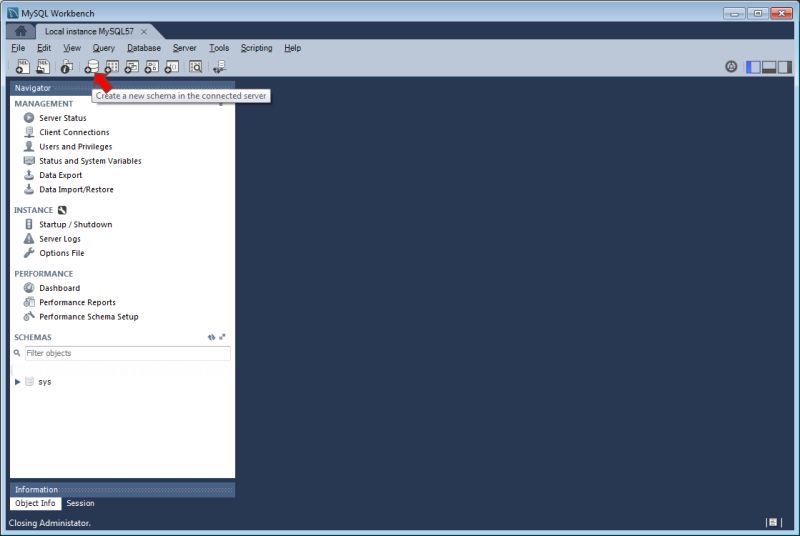
and provide a name for the database (for example msnoise; or msnoise_project1, or project1, or anything else) ; and click “Apply”:
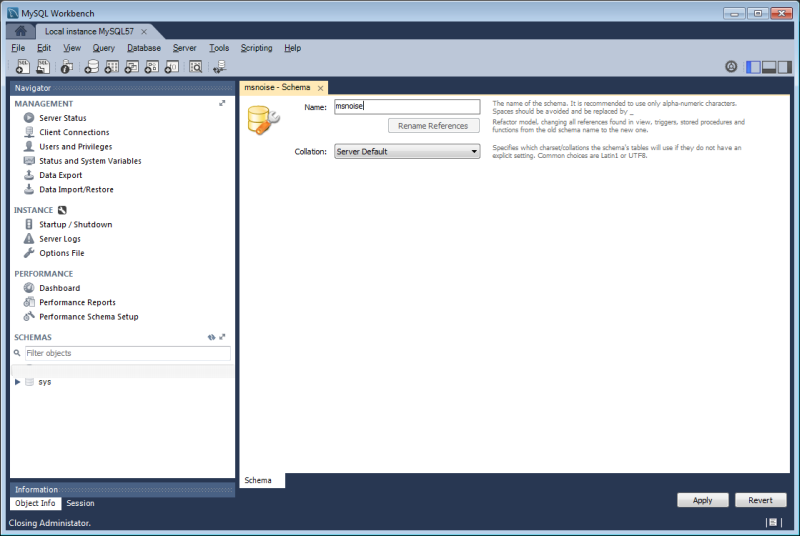
and click “Apply” again and it should state all is OK:
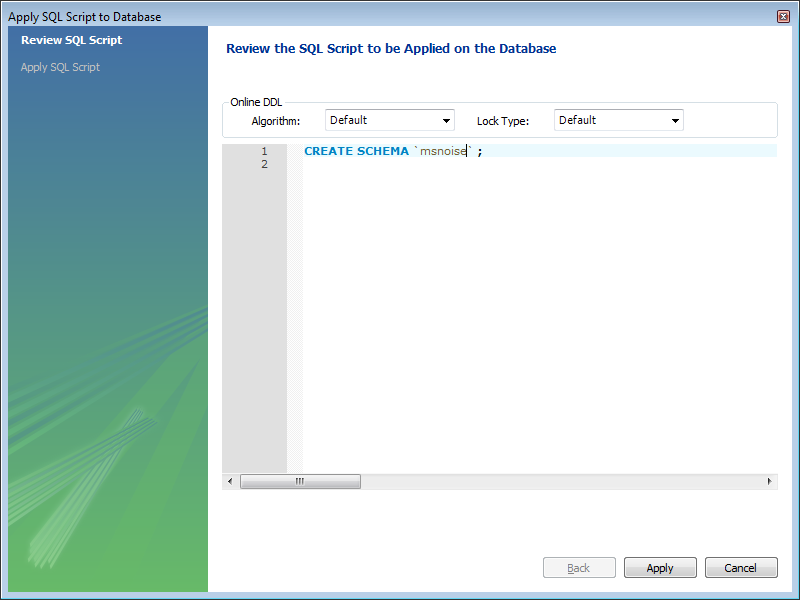
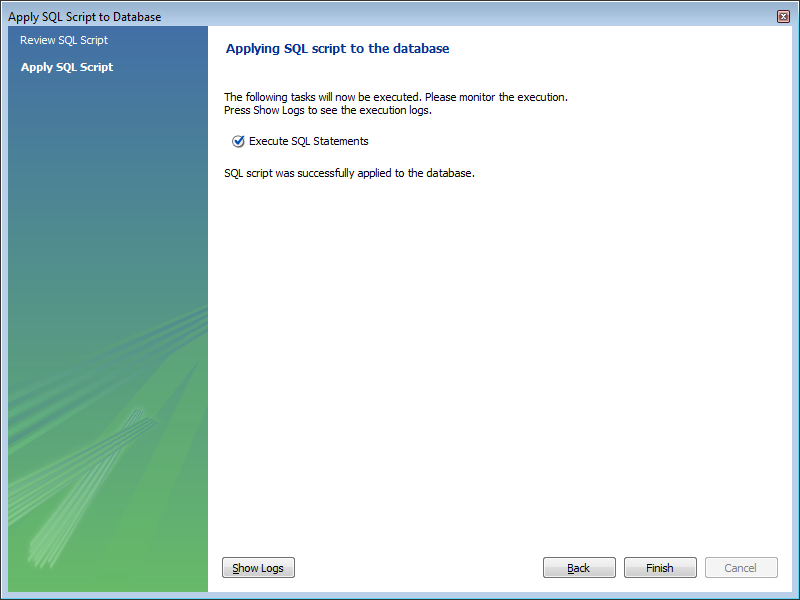
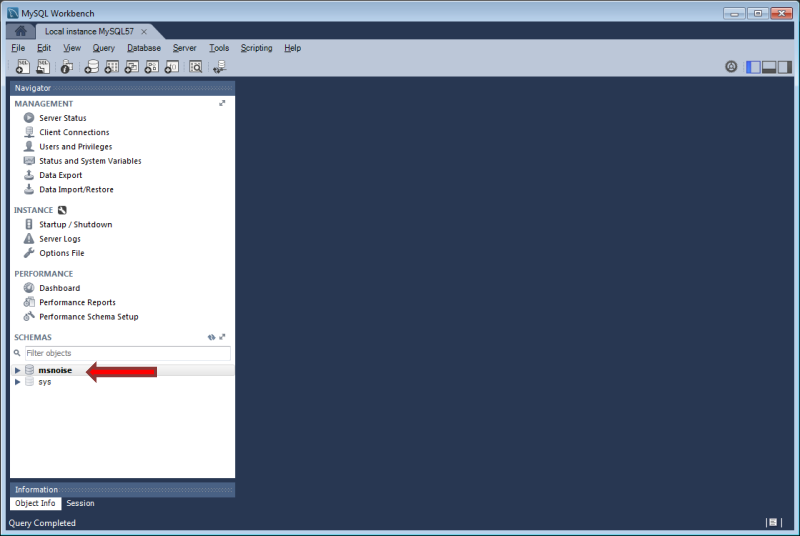
When done, the database we can be seen in the left sidebar:
And you’re ready to start your first project: Workflow.
When moving your project to a larger server, HPC or else, just add the connection to this server in Workbench and you’re good to go with the very same interface/tool !
MySQL/MariaDB configuration
You can also set up a database server using MariaDB, there are plenty tutorials of how to set it up as well. The new default character set for MySQL or MariaDB is not simple utf8, so make sure that the configuration file (/etc/mysql/my.cnf under Linux) contains the following lines. There are issues with the latest MySQL versions which prevent a “traditional group by” statement.
[mysqld]
character-set-server=utf8
collation-server=utf8_unicode_ci
sql_mode="TRADITIONAL,NO_AUTO_CREATE_USER"
For Mac, this seemed to work for users (see Issue72):
[mysqld]
 sql_mode=STRICT_TRANS_TABLES,NO_ZERO_IN_DATE,NO_ZERO_DATE,ERROR_FOR_DIVISION_BY_ZERO,NO_AUTO_CREATE_USER,NO_ENGINE_SUBSTITUTION
Database Structure - Tables
MSNoise will create the tables automatically upon running the installer script (see Workflow).
Building this documentation
To build this documentation, some modules are required:
pip install sphinx
pip install sphinx_bootstrap_theme
Then, this should simply work:
make html
it will create a .build folder containing the documentation.
You can also build the doc to Latex and then use your favorite Latex-to-PDF tool.
Using the development version
This is not recommended, but users willing to test the latest development (hopefully stable) version of MSNoise can:
pip uninstall msnoise
pip install http://msnoise.org/master.zip
Please note this version most probably uses the very latest version of every package: Release versions of numpy, scipy, etc obtained from conda-forge and “master” version of obspy. The development version (master) of obspy can be installed from github:
pip uninstall obspy
pip install https://github.com/obspy/obspy/archive/master.zip
If you are using the master version, please use the issue tracker of github to communicate about bugs and not the mailing list, preferably used for Releases.